やりたいこと
メインビジュアルがスライダーになっていて、そのスライド1枚1枚の追加や各種設定を管理画面から行いたいケースはよくありますね。
例えば、以下のような仕様です。
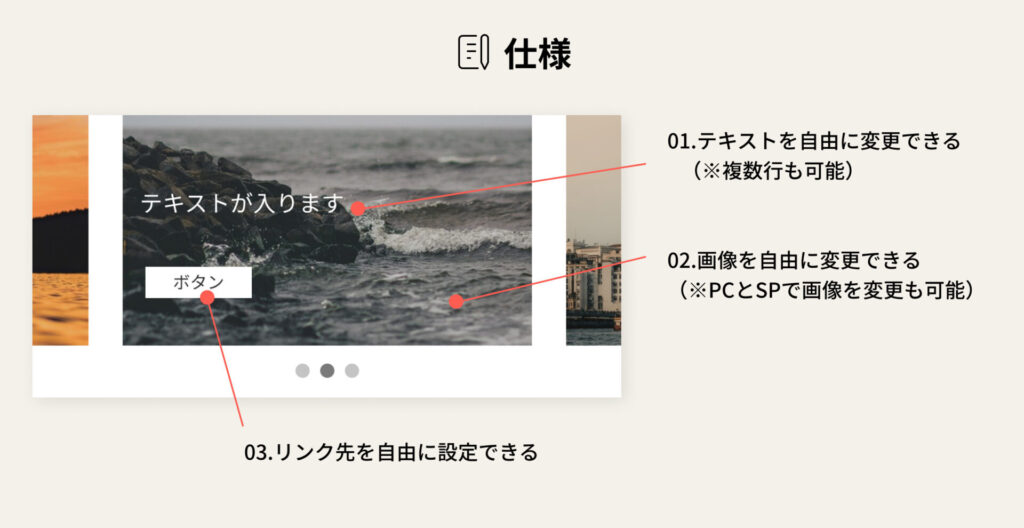
実装方法
以下のような流れで実装を進めます。
ただし、HTML・CSS・JSを含めたスライダー実装自体は完了している状態が前提となります。
以下の記事のSample05が今回の実装に近いのかなと思います。
https://tips-web.net/slick-slider-sample/
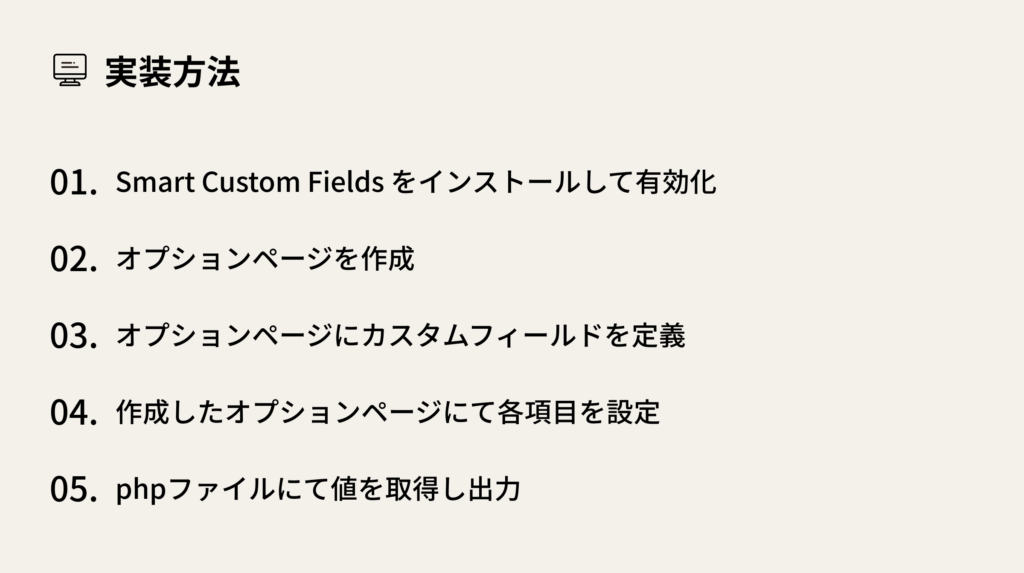
01. Smart Custom Fields をインストールして有効化
まずはWordPressの管理画面にてSmart Custom Fieldsをインストールして有効化してください。
02. オプションページを作成
functions.phpにて、オプションページを作成するための記述をします。
引数は全部で6つありますが、前半の4つが必須項目です。
👇オプションページを作成
//TOPスライダー設定
/**
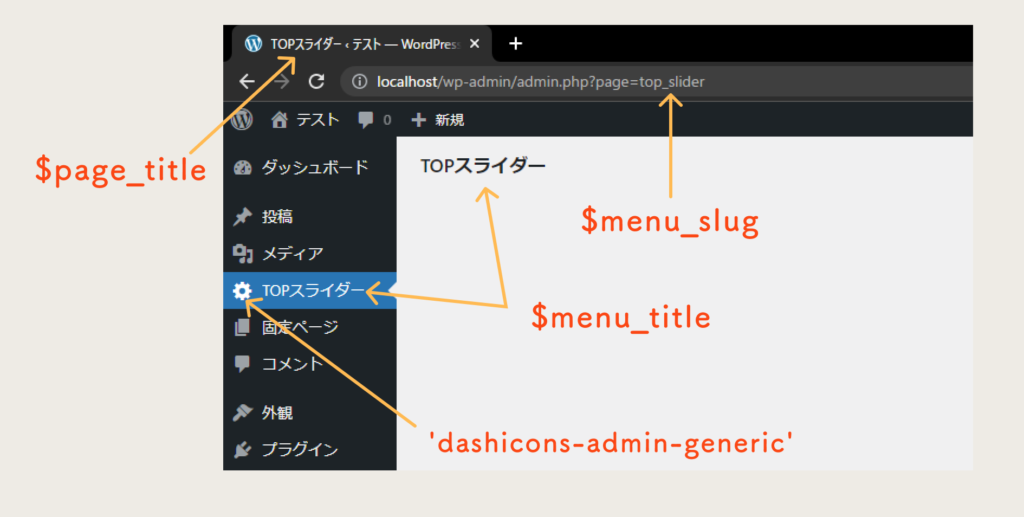
* @param string $page_title ページのtitle属性値 (必須)
* @param string $menu_title 管理画面のメニューに表示するタイトル (必須)
* @param string $capability メニューを操作できる権限 (必須)
* @param string $menu_slug オプションページのスラッグ (必須)
* @param string|null $icon_url メニューに表示するアイコンの URL
* @param int $position メニューの位置
*/
SCF::add_options_page( 'TOPスライダー', 'TOPスライダー', 'edit_posts', 'top_slider' , 'dashicons-admin-generic' , 11);これで管理画面を再読み込みすると、以下のように「TOPスライダー」という名前でページができています。
03. オプションページにカスタムフィールドを定義
続いて、作成したオプションページにカスタムフィールドを定義します。
管理画面から項目を設定してもいいのですが、functions.phpに書いて定義する方法を紹介します。
👇functions.phpに記述
/**
 * カスタムフィールドを定義
 *
 * @param array  $settings  MW_WP_Form_Setting オブジェクトの配列
 * @param string $type      投稿タイプ or ロール
 * @param int    $id        投稿ID or ユーザーID
 * @param string $meta_type post | user
 * @return array
 *
 */
function my_add_meta_box($settings, $type, $id, $meta_type)
{
  if ('top_slider' == $type) {
    $setting = SCF::add_setting('id-top_slider', 'TOPスライダー設定');
    $items = array(
      array(
        'type'        => 'image', //*タイプ
        'name'        => 'top_slider_img_pc', //*名前
        'label'       => '【PC】スライダー画像', //ラベル
        'size'        => 'medium' // プレビューサイズ
      ),
      array(
        'type'        => 'image', //*タイプ
        'name'        => 'top_slider_img_sp', //*名前
        'label'       => '【SP】スライダー画像', //ラベル
        'size'        => 'medium' // プレビューサイズ
      ),
      array(
        'type'        => 'textarea',                      // タイプ
        'name'        => 'top_slider_text',                   // 名前
        'label'       => 'スライダーテキスト設定',        // ラベル
        'rows'        => 3,                               // 行数
      ),
      array(
        'type'        => 'text', //*タイプ
        'name'        => 'top_slider_link', //*名前
        'label'       => 'リンク設定', //ラベル
      ),
    );
    $setting->add_group('top_slider_group', true, $items);
    $settings[] = $setting;
  }
  return $settings;
}
add_filter('smart-cf-register-fields', 'my_add_meta_box', 10, 4);
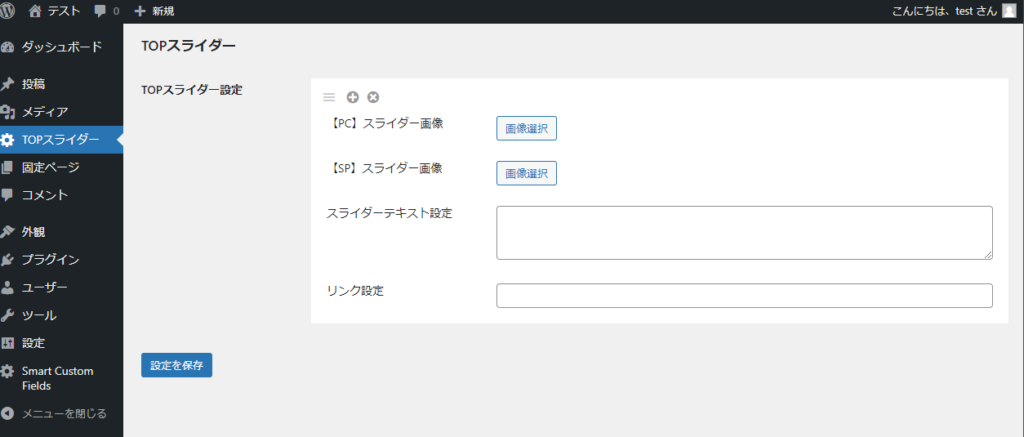
これで、先ほど作成したオプションページに移動すると、カスタムフィールドが出現します!
※デバッグモードをtrueにしている場合、以下のような警告(Warning)がでますが、いったん無視してOKです。
邪魔な場合はデバッグモードをfalseにしましょう。
それでも消えない場合は、error_reporting(0);という記述をfunctions.phpに追記すればOKです。
Declaration of Smart_Custom_Fields_Controller_Option::admin_enqueue_scripts($hook) should be compatible with Smart_Custom_Fields_Controller_Base::admin_enqueue_scripts() in hoge\wp-content\plugins\smart-custom-fields\classes\controller\class.option.php on line 27- カスタムフィールドをfunctions.phpで管理する方法については以下の記事を参考にしてください。
https://yosiakatsuki.net/blog/smart-custom-fields-code-base/
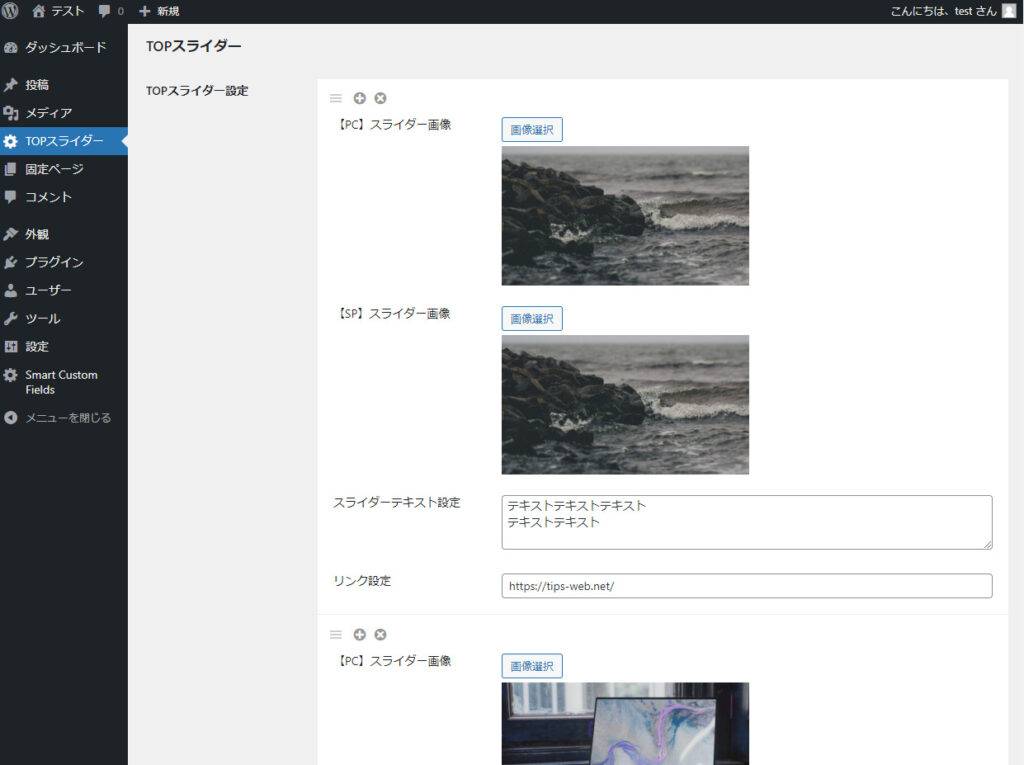
04. 作成したオプションページにて各項目を設定
作成したオプションページにて、先ほど定義したカスタムフィールドの各項目に値を設定していきます。
05. phpファイルにて値を取得し出力
最後に、カスタムフィールドに設定した値を取得して表示したい場所に出力します。
<?php
$top_slider = SCF::get_option_meta('top_slider');
$top_slider_group = $top_slider['top_slider_group'];
if (!empty($top_slider_group)) :
?>

  <div class="mv-block">
    <div class="mv-slider">
      <?php foreach ($top_slider_group as $item) :
        //画像
        $top_img_pc_id = $item['top_slider_img_pc'];
        $top_img_pc_src = wp_get_attachment_url($top_img_pc_id);
        $top_img_sp_id = $item['top_slider_img_sp'];
        $top_img_sp_src = wp_get_attachment_url($top_img_sp_id);

        //alt
        $alt_pc = get_post_meta($top_img_pc_id, '_wp_attachment_image_alt', true);

        //テキスト
        $top_slider_text = $item['top_slider_text'];

        //ボタンリンク
        $top_slider_link = $item['top_slider_link'];
      ?>
        <div class="slider-item">
          <div class="slider-img">
            <picture>
              <source srcset="<?php echo $top_img_pc_src;?>" media="(min-width: 768px)" /><!-- 幅768px以上なら表示 -->
              <img src="<?php echo $top_img_sp_src;?>" alt="<?php echo $alt_pc;?>" />
            </picture>
          </div>
          <div class="slider-text slider-text01">
            <?php echo nl2br($top_slider_text);?>
          </div>
          <a href="<?php echo $top_slider_link;?>" class="slider-button">
            ボタン
          </a>
        </div>
      <?php endforeach; ?>
    </div>
  </div>
<?php endif; ?>
👇HTMLのマークアップは、以下の記事のSample05をベースにしています。
https://tips-web.net/slick-slider-sample/