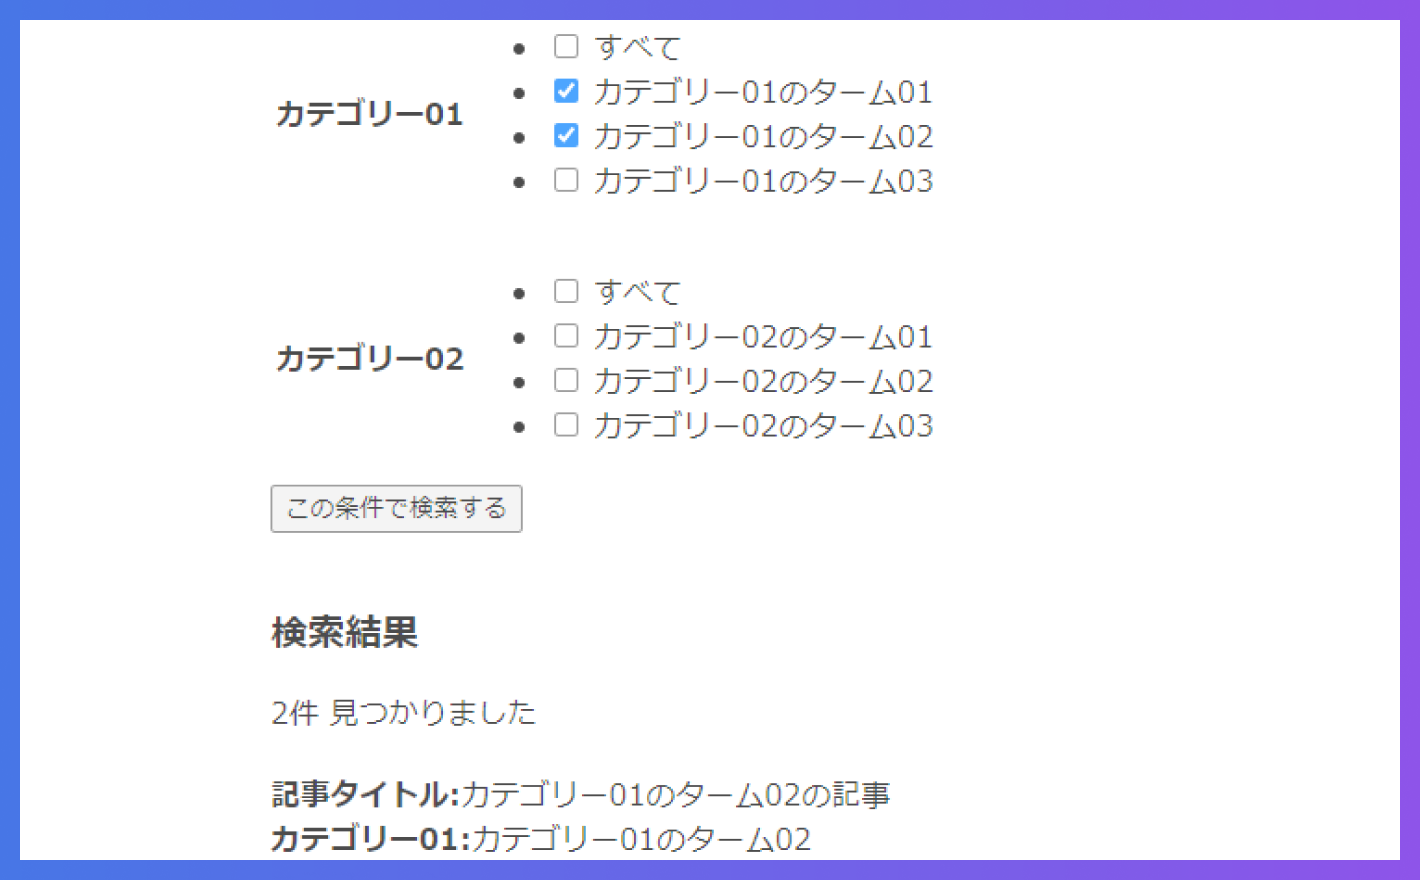
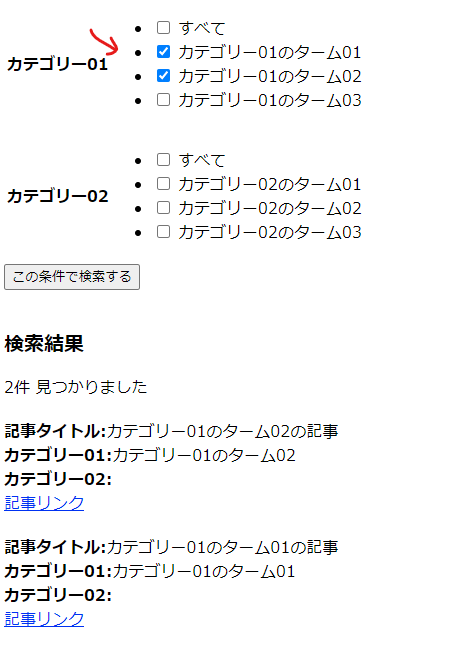
早速ですが、この記事では以下のようなタクソノミー(カテゴリー)が複数ある検索フォームの実装について紹介したいと思います。
👇今回実装する検索フォーム
カスタム投稿を作成する
まずはカスタム投稿を作成します。
プラグインを使って作成する方法もあると思いますが、今回はfunctions.phpで作成します。
/**
* ************************************************************************
* カスタム投稿
* ************************************************************************
*/
/**
* 定義
*/
add_action('init', 'my_add_custom_post');
function my_add_custom_post()
{
register_post_type(
'test_post_type',
array(
'label' => 'テストカスタム投稿',
'labels' => array(
'name' => 'テストカスタム投稿',
'singular_name' => 'テストカスタム投稿',
'all_items' => 'テストカスタム投稿一覧',
),
'public' => true,
'has_archive' => true,
'menu_position' => 5,
'supports' => array(
'title',
'editor',
'custom-fields',
'thumbnail',
'revisions',
),
'show_in_rest' => true, // Gutenbergエディタを有効
)
);
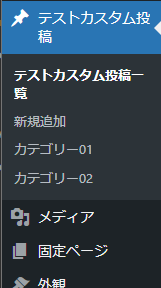
}「テストカスタム投稿」というカスタム投稿を作成しました。
スラッグはtext_post_typeにしています。
実際の案件では、カスタム投稿「お知らせ」だったらスラッグは「news」とかになります。
タクソノミーを作成する
この記事では複数のタクソノミーを想定しているので2つ作成します。
これもfunctions.phpで作成します。
/**
 * カスタムタクソノミー
 */
add_action('init', 'my_add_taxonomy');
function my_add_taxonomy()
{
  register_taxonomy(
    'tax_01', // タクソノミー名
    array('test_post_type'), // カスタム投稿タイプ名
    array(
      'label' => 'カテゴリー01',
      'labels' => array(
        'all_items' => '全てのカテゴリー01',
        'add_new_item' => 'カテゴリ01ーを追加'
      ),
      'public' => true,
      'hierarchical' => true,
      'show_in_rest' => true,
      'rewrite' => array(
        'slug' => 'test_post_type',
      ),
    )
  );
  register_taxonomy(
    'tax_02', // タクソノミー名
    array('test_post_type'), // カスタム投稿タイプ名
    array(
      'label' => 'カテゴリー02',
      'labels' => array(
        'all_items' => '全てのカテゴリー02',
        'add_new_item' => 'カテゴリ02ーを追加'
      ),
      'public' => true,
      'hierarchical' => true,
      'show_in_rest' => true,
      'rewrite' => array(
        'slug' => 'test_post_type',
      ),
    )
  );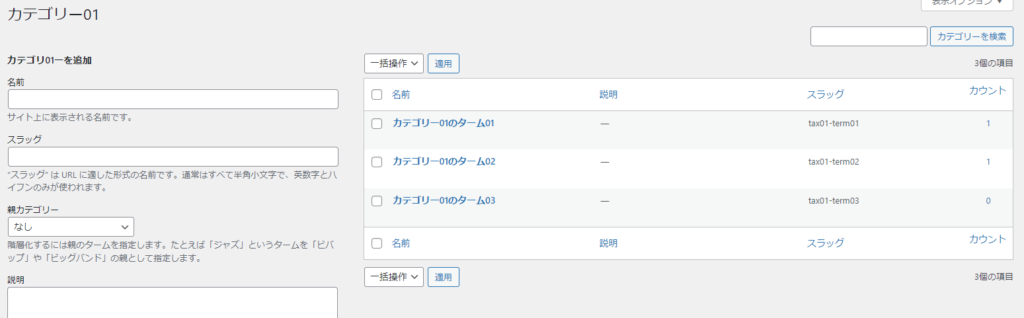
}カテゴリー01という名前でスラッグがtax_01というのと、カテゴリー02という名前でスラッグがtax_02というのを2つ作成しています。
この段階で、WordPressの管理画面では以下のようになっています。
タームを作成する
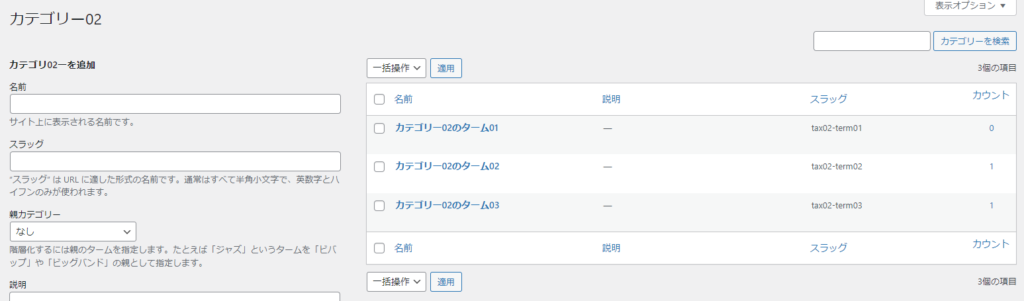
作成したカテゴリー01と02にそれぞれタームを作成します。
今回は以下のように作成しました。
「カウント」のところが1になっているタームがありますが、このあと記事を作成して、作成したタームと紐づけていきますので気にしないでください。
👇カテゴリー01のターム
👇カテゴリー02のターム
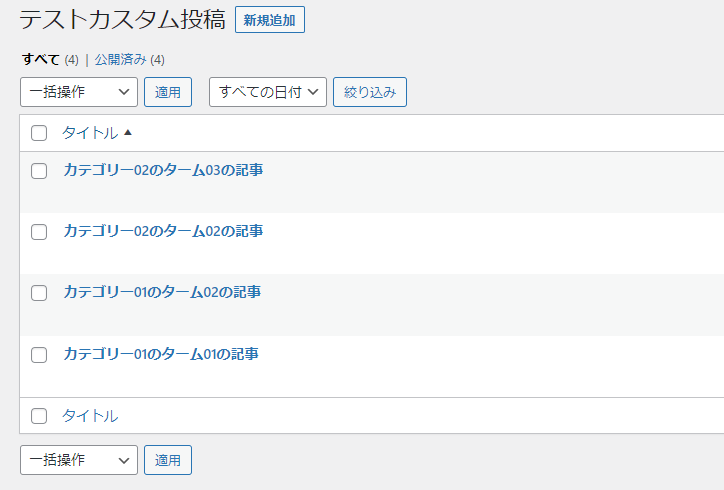
記事を作成する
先ほど作成したタームに紐づく記事を作成します。
今回は4つ作成します。
検索機能でデバッグしやすいように、カテゴリー01のターム01とカテゴリー01のターム02に紐づく記事を2つ作成するのと、カテゴリー02のターム01とカテゴリー02のターム02に紐づく記事を2つ作成します。
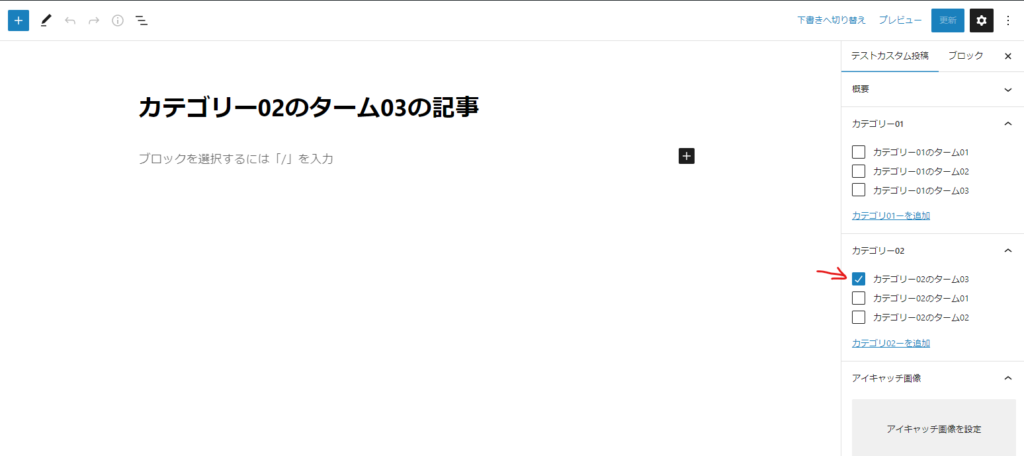
たとえば、「カテゴリー02のターム03の記事」の記事編集画面は以下のようになっています。
さて、データが整ったのでいよいよ検索機能を実装していきます。
検索フォームを作成する
まず検索フォームを作成しましょう。
以下のコードを適用な場所にコピペしてください。
page.phpでもいいし、header.phpでもいいし、WordPressのテンプレートファイルならどこでもいいです。
今回私はindex.phpに貼り付けてみます。
<div>
  <form action="<?php echo home_url(); ?>" method="GET">
    <input type="hidden" name="s">
    <table>
      <tbody>
        <tr>
          <th>カテゴリー01</th>
          <td>
            <div>
              <ul>
                <?php
                $taxonomies = 'tax_01';
                $args = array(
                  'hide_empty'    => false,
                  'orderby' => 'menu_order',
                  'parent' => 0
                );

                ?>
                <li>
                  <label>
                    <input type="checkbox" name="tax_01[]" value="all">
                    <span>すべて</span>
                  </label>
                </li>
                <?php
                $tax_01_terms = get_terms($taxonomies, $args);
                foreach ($tax_01_terms as $term) :
                  $term_name = $term->name;
                  $term_slug = $term->slug;
                  $term_id = $term->term_id;
                ?>
                  <li>
                    <label>
                      <input type="checkbox" name="tax_01[]" value="<?php echo $term_slug; ?>">
                      <span><?php echo $term_name; ?></span>
                    </label>
                  </li>
                <?php endforeach; ?>
              </ul>
            </div>
          </td>
        </tr>
        <tr>
          <th>カテゴリー02</th>
          <td>
            <div>
              <ul>
                <?php
                $taxonomies = 'tax_02';
                $args = array(
                  'hide_empty'    => false,
                  'orderby' => 'menu_order',
                  'parent' => 0
                );

                ?>
                <li>
                  <label>
                    <input type="checkbox" name="tax_02[]" value="all">
                    <span>すべて</span>
                  </label>
                </li>
                <?php
                $tax_02_terms = get_terms($taxonomies, $args);
                foreach ($tax_02_terms as $term) :
                  $term_name = $term->name;
                  $term_slug = $term->slug;
                  $term_id = $term->term_id;
                ?>
                  <li>
                    <label>
                      <input type="checkbox" name="tax_02[]" value="<?php echo $term_slug; ?>">
                      <span><?php echo $term_name; ?></span>
                    </label>
                  </li>
                <?php endforeach; ?>
              </ul>
            </div>
          </td>
        </tr>
      </tbody>
    </table>
    <button type="submit">
      この条件で検索する
    </button>
  </form>
</div>検索フォームなのでHTMLのformタグで作成します。
また、action属性はお決まりとしてhome_url()を指定します。
さらに、methodはGETとします。
まずこれらが大前提として重要です★
次に、WordPressの検索結果を表示するテンプレートファイルはsearch.phpなのですが、このテンプレートファイルを表示するためにはname属性がsのinputタグをformタグの中に入れておく必要があります。
より正確にいうなら、GETパラメータにsがあればsearch.phpが表示されるので、formタグの中にname属性がsのinputタグを用意しておきます。
ここまでが検索フォームの基礎です。
これでformタグの中にあるbuttonタグ(typeはsubmit)を押せば、search.phpが表示されますので、search.phpに検索ロジックを書けばOKです。
ただ、カスタム投稿ごとに検索結果のテンプレートファイルを分けたいということも多いと思うので今回はその対応も紹介します。
検索結果フォームをカスタム投稿ごとに分ける
まず、functions.phpに以下を追記します。
/**
 * 検索結果ファイルを使い分ける(カスタム投稿newsならsearch-news.phpを作る)
 */
add_filter('template_include', 'my_search_template');
function my_search_template($template)
{
  if (is_search()) {
    $post_types = get_query_var('post_type');
    foreach ((array) $post_types as $post_type)
      $templates[] = "search-{$post_type}.php";
    $templates[] = 'search.php';
    $template = get_query_template('search', $templates);
  }
  return $template;
}
これを追記したうえで、先ほど作成した検索フォームに以下を追記します。
<form action="<?php echo home_url(); ?>" method="GET">
    <!-- 追記ここから -->
    <input type="hidden" name="post_type" value="test_post_type">
    <!-- 追記ここまで -->
<input type="hidden" name="s">name属性がpost_typeで、valueにカスタム投稿のスラッグ(今回はtest_post_type)を指定することで、先ほど追記したfunctions.phpのコードが機能し、カスタム投稿ごとにsearch.phpを出しわけることができます。
ただ、まだ、このカスタム投稿用のsearch.phpを作成していないので作成する必要があります。
具体的には、テーマフォルダ直下(page.phpとかsingle.phpとかがある階層)に、search-test_post_type.phpというファイルを作成することで、検索ボタンを押したときにこのテンプレートファイルが適用されます。
検索結果を表示する
先ほど作成したsearch-test_post_type.phpに以下をコピペします。
<?php
get_header(); ?>
<?php
//エスケープ用
function sethtmlspecialchars($data)
{
if (is_array($data)) { //データが配列の場合
return array_map('sethtmlspecialchars', $data);
} else { //データが配列ではない場合
return htmlspecialchars($data, ENT_QUOTES, 'UTF-8');
}
}
//検索タイプ
$tax_01 = []; //カテゴリー01
$tax_02 = []; //カテゴリー02
//GETの設定
if (isset($_GET['s']) && $_GET['s']) {
$s = sethtmlspecialchars($_GET['s']);
}
if (isset($_GET['tax_01']) && $_GET['tax_01']) {
$tax_01 = sethtmlspecialchars($_GET['tax_01']);
}
if (isset($_GET['tax_02']) && $_GET['tax_02']) {
$tax_02 = sethtmlspecialchars($_GET['tax_02']);
}
$paged = get_query_var('paged') ? get_query_var('paged') : 1;
$args = array(
'paged' => $paged,
'post_type' => array('test_post_type'), //カスタム投稿タイプtest_post_type
'post_status' => array('publish'), //公開状態
'order' => 'DESC', //降順
'orderby' => 'date', //日付で並び替える
'posts_per_page' => 10 // 1ページあたり10件表示
);
//タクソノミー検索条件追加用配列
$tax_query = [];
//カテゴリー01に値があり、「all」ではないときのみtax_query配列に条件追加。
if (!empty($tax_01) && !in_array('all', $tax_01)) {
$tax_query[] = array(
'taxonomy' => 'tax_01',
'field' => 'slug',
'terms' => $tax_01,
);
}
//カテゴリー02に値があり、「all」ではないときのみtax_query配列に条件追加。
if (!empty($tax_02) && !in_array('all', $tax_02)) {
$tax_query[] = array(
'taxonomy' => 'tax_02',
'field' => 'slug',
'terms' => $tax_02,
);
}
//tax_queryに格納
if (count($tax_query) > 0) {
//AND検索(デフォルト)
$tax_query['relation'] = 'AND';
$args += array('tax_query' => $tax_query);
}
$the_query = new WP_Query($args);
/**
* 検索条件を残す処理
*/
//カテゴリ01
function checkTax01($param)
{
global $tax_01;
if (in_array($param, $tax_01)) {
echo 'checked';
}
}
//カテゴリ02
function checkTax02($param)
{
global $tax_02;
if (in_array($param, $tax_02)) {
echo 'checked';
}
}
get_header(); ?>
<form action="<?php echo home_url(); ?>" method="GET">
<input type="hidden" name="post_type" value="test_post_type">
<input type="hidden" name="s">
<table>
<tbody>
<tr>
<th>カテゴリー01</th>
<td>
<div>
<ul>
<?php
$taxonomies = 'tax_01';
$args = array(
'hide_empty' => false,
'orderby' => 'menu_order',
'parent' => 0
);
?>
<li>
<label>
<input type="checkbox" name="tax_01[]" value="all" <?php checkTax01('all'); ?>>
<span>すべて</span>
</label>
</li>
<?php
$tax_01_terms = get_terms($taxonomies, $args);
foreach ($tax_01_terms as $term) :
$term_name = $term->name;
$term_slug = $term->slug;
$term_id = $term->term_id;
?>
<li>
<label>
<input type="checkbox" name="tax_01[]" value="<?php echo $term_slug; ?>" <?php checkTax01($term_slug); ?>>
<span><?php echo $term_name; ?></span>
</label>
</li>
<?php endforeach; ?>
</ul>
</div>
</td>
</tr>
<tr>
<th>カテゴリー02</th>
<td>
<div>
<ul>
<?php
$taxonomies = 'tax_02';
$args = array(
'hide_empty' => false,
'orderby' => 'menu_order',
'parent' => 0
);
?>
<li>
<label>
<input type="checkbox" name="tax_02[]" value="all" <?php checkTax02('all'); ?>>
<span>すべて</span>
</label>
</li>
<?php
$tax_02_terms = get_terms($taxonomies, $args);
foreach ($tax_02_terms as $term) :
$term_name = $term->name;
$term_slug = $term->slug;
$term_id = $term->term_id;
?>
<li>
<label>
<input type="checkbox" name="tax_02[]" value="<?php echo $term_slug; ?>" <?php checkTax02($term_slug); ?>>
<span><?php echo $term_name; ?></span>
</label>
</li>
<?php endforeach; ?>
</ul>
</div>
</td>
</tr>
</tbody>
</table>
<button type="submit">
この条件で検索する
</button>
</form>
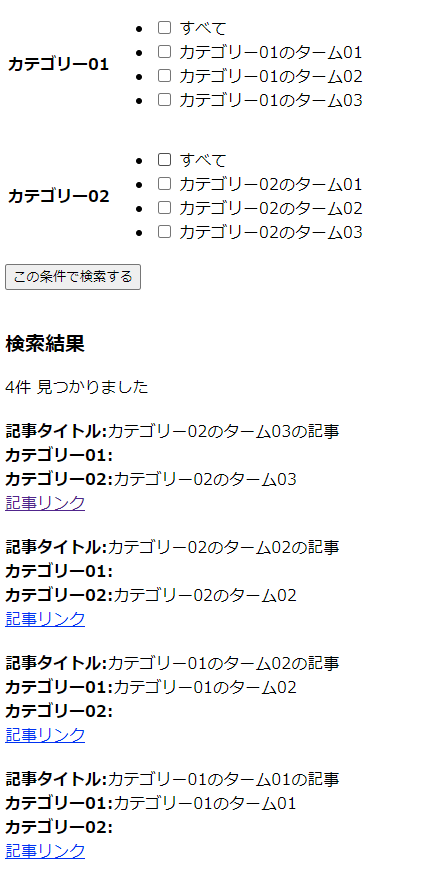
<?php if ($the_query->have_posts()) : ?>
<div style="margin-top:40px;">
<div>
<b style="font-size:20px;">検索結果</b>
<p>
<span><?php echo $the_query->found_posts; ?>件</span>
<span>見つかりました</span>
</p>
</div>
<?php
while ($the_query->have_posts()) : $the_query->the_post();
//各種データ取得
$title = get_the_title();
$post_id = get_the_ID();
/**
* カテゴリー取得
*/
$tax_01 = get_the_terms($post_id, 'tax_01'); //カテゴリー01
$tax_02 = get_the_terms($post_id, 'tax_02'); //カテゴリー02
?>
<div style="margin-top:20px;">
<div><b>記事タイトル:</b><?php echo $title; ?></div>
<div><b>カテゴリー01:</b><?php echo $tax_01[0]->name; ?></div>
<div><b>カテゴリー02:</b><?php echo $tax_02[0]->name; ?></div>
<div><a href="<?php the_permalink(); ?>">記事リンク</a></div>
</div>
<?php endwhile; ?>
<?php
/* ページャーの表示 */
// if (function_exists('pagination')) :
// pagination($the_query->max_num_pages, get_query_var('paged'));
// endif;
?>
</div>
<?php else : ?>
見つかりませんでした。
<?php endif;
wp_reset_postdata(); ?>
<?php get_footer(); ?>ポイント01: エスケープ処理
以下の独自関数を用意しています。これは取得したGETパラメータをエスケープ処理するための関数です。
//エスケープ用
function sethtmlspecialchars($data)
{
    if (is_array($data)) { //データが配列の場合
        return array_map('sethtmlspecialchars', $data);
    } else { //データが配列ではない場合
        return htmlspecialchars($data, ENT_QUOTES, 'UTF-8');
    }
}
$dataが配列のときとそうじゃないときで処理を分けています。
以下のPHPの関数を内部的に使っていますので気になる方は調べてみてください。
この関数を使って、以下の箇所でGETパラメータの値を取得しています。
//検索タイプ
$tax_01 = []; //カテゴリー01
$tax_02 = []; //カテゴリー02


//GETの設定
if (isset($_GET['tax_01']) && $_GET['tax_01']) {
    $tax_01 = sethtmlspecialchars($_GET['tax_01']);
}
if (isset($_GET['tax_02']) && $_GET['tax_02']) {
    $tax_02 = sethtmlspecialchars($_GET['tax_02']);
}たまに、以下のように直接GETパラメータの値を取得している人がいるのですがこれはセキュリティの観点から非常に危険です。
$tax_01 = $_GET['tax_01'];今回の場合だとSQLインジェクションが起こりえます。
それ以外にも、エスケープしないことでXSS(クロスサイト・スクリプティング)の危険性もあります。
このあたりについて詳しくは以下の記事を是非読んでみてください。
ポイント02: サブクエリの作成
受け取ったGETパラメータの値によってサブクエリの内容を適切に処理していきます。
WordPressのサブクエリといえば、以下のようにして作成しますよね。
$the_query = new WP_Query($args);$argsの内容をもとにWP_Queryによってサブクエリが作成されますので、$argsの中身が非常に重要になります。
まずはデフォルトで以下を用意しています。
$args = array(
    'paged' => $paged,
    'post_type' => array('test_post_type'), //カスタム投稿タイプtest_post_type
    'post_status' => array('publish'), //公開状態
    'order' => 'DESC', //降順
    'orderby' => 'date', //日付で並び替える
    'posts_per_page' => 10 // 1ページあたり10件表示
);
検索フォームでどこにチェックを入れようが入れまいが、$argsに共通して入れておくべき内容を指定します。
続いて、タクソノミーに関する条件を$argsに追加していきます。
具体的には以下の部分です。
//タクソノミー検索条件追加用配列
$tax_query = [];

//カテゴリー01に値があり、「all」ではないときのみtax_query配列に条件追加。
if (!empty($tax_01) && !in_array('all', $tax_01)) {
    $tax_query[] = array(
        'taxonomy' => 'tax_01',
        'field' => 'slug',
        'terms' => $tax_01,
    );
}
//カテゴリー02に値があり、「all」ではないときのみtax_query配列に条件追加。
if (!empty($tax_02) && !in_array('all', $tax_02)) {
    $tax_query[] = array(
        'taxonomy' => 'tax_02',
        'field' => 'slug',
        'terms' => $tax_02,
    );
}


//tax_queryに格納
if (count($tax_query) > 0) {
    //AND検索(デフォルト)
    $tax_query['relation'] = 'AND';
    $args += array('tax_query' => $tax_query);
}
以下で、タクソノミーは複数あることを想定しているので、それらタクソノミーの条件を適宜格納するための配列を用意しています。
//タクソノミー検索条件追加用配列
$tax_query = [];
続いて、たとえば検索フォームにて「カテゴリー01のターム01」にチェックを入れて検索したときは以下の処理が走ります。
//カテゴリー01に値があり、「all」ではないときのみtax_query配列に条件追加。
if (!empty($tax_01) && !in_array('all', $tax_01)) {
    $tax_query[] = array(
        'taxonomy' => 'tax_01',
        'field' => 'slug',
        'terms' => $tax_01,
    );
}
「すべて」にチェックを入れているときは、何もチェックを入れずに検索したときと同じ条件なのでtax_queryには検索条件として含めないようにしています。
最後に、tax_queryを$argsに追加しています。
ただし、tax_queryの中身が空じゃないときに限ります。
//tax_queryに格納
if (count($tax_query) > 0) {
    //AND検索(デフォルト)
    $tax_query['relation'] = 'AND';
    $args += array('tax_query' => $tax_query);
}
以上で$argsをもとにWP_Queryによりサブクエリを作成し、あとはこれをループして検索結果を出力すればOKです。
おまけ
おまけとして、検索結果を表示した際に、どの検索条件で検索したのかわかるようにしている箇所があるので紹介します。
具体的にはsearch-test_post_type.phpの以下の部分です。
/**
 * 検索条件を残す処理
 */
//カテゴリ01
function checkTax01($param)
{
    global $tax_01;
    if (in_array($param, $tax_01)) {
        echo 'checked';
    }
}
//カテゴリ02
function checkTax02($param)
{
    global $tax_02;
    if (in_array($param, $tax_02)) {
        echo 'checked';
    }
}
検索フォームは今回、チェックボックスでした。
チェックボックスの場合、GETパラメータで受け取った値は配列として渡ってきます。(name属性をtax_01[]やtax_02[]としているため。)
その配列の中に、関数の引数として受け取った値が含まれているかどうかを、PHPの関数であるin_arrayを使ってチェックしています。
もしin_arrayの結果がtrueだったらcheckedをechoしています。
こうして作成した関数を、検索結果のフォームの部分に以下のようにして使っています。
具体的にはsearch-test_post_type.phpの以下の部分です。
<li>
    <label>
        <input type="checkbox" name="tax_01[]" value="all" <?php checkTax01('all'); ?>>
        <span>すべて</span>
    </label>
</li>
これで、チェックを入れて検索した際に、どの項目にチェックしたかが検索結果でもわかるようになります。
補足①
今回、検索結果のページネーションまでは実装していません。
私は普段こちらの記事を参考にページネーションを実装しており、その際にはsearch-test_post_type.phpの以下の箇所にコメントアウトしてあるようにコードを書けば、ページネーションが表示されると思います。
<?php
/* ページャーの表示 */
// if (function_exists('pagination')) :
//     pagination($the_query->max_num_pages, get_query_var('paged'));
// endif;
?>
補足②
search-test_post_type.phpに、HTMLタグに直接インラインでcssを記述していますが、あまり良くないのでstyle.cssなどのcssファイルにちゃんと書いた方がいいです。
今回はcssが焦点の記事じゃないのでインラインで書いています。
おわりに
いかがだったでしょうか。
一見シンプルな検索フォームですがやってみると意外に大変かと思います。
それはWordPressのsearch.phpのそもそもの仕組みを知らないことだったり、サブクエリの細かな内容を知らなかったり、PHPの基礎知識が無くて苦しむことが多いのが、この検索フォームだからです。
ただ、その分色々学ぶことは多いのでぜひこの記事のコードを読むなりして理解を深めていただけたら嬉しいです。
自分が作成したこちらの教材では、この記事で紹介した内容よりも、より複雑で本格的な検索フォームの実装例も含まれているのでよかったらご検討ください。